Docmost Docker Compose Install: Self-Hosted Wiki for Teams
Install Docmost with Docker Compose: self-hosted wiki setup with PostgreSQL, Redis, SSL, reverse proxy, WebSocket config, and troubleshooting.
 Dragos23 min read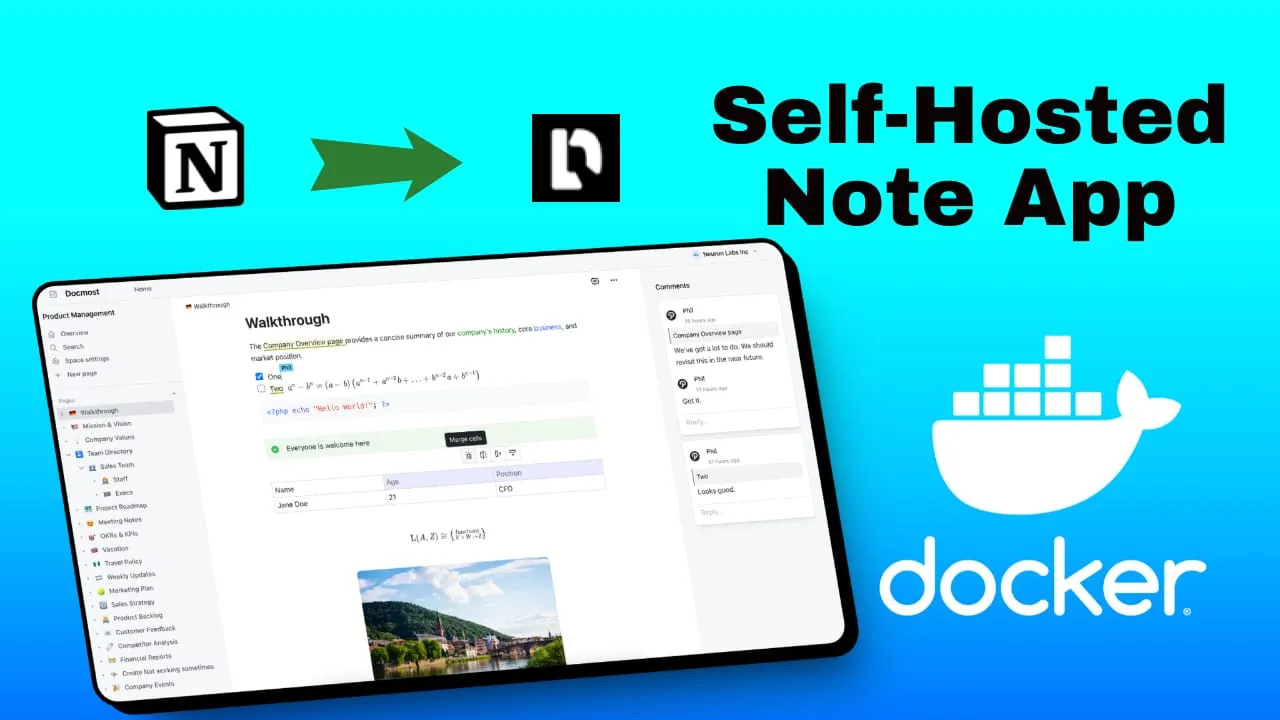
Docmost is an open-source collaborative wiki and documentation platform built as a self-hosted alternative to Confluence and Notion. With over 21,200 GitHub stars and an active community, it’s become one of the most popular self-hosted wiki options for teams that want to own their data.
Docmost gives you a real-time collaborative editor with rich text formatting, markdown support, page nesting, spaces for organizing content by team or project, and inline commenting. It runs on TypeScript with PostgreSQL and Redis, which makes the Docker Compose install straightforward. Three containers and you’re running.
This guide walks through a complete Docmost Docker Compose install on a Linux VPS: the updated compose configuration, environment variables, SSL with a reverse proxy, and the gotchas that trip people up (WebSocket headers, APP_SECRET length, database passwords).
If you want to monitor server resources like CPU, memory, and disk space after deployment, check how to monitor server and Docker resources.
If you are looking for other self-hosted documentation and note-taking apps, also check:
What is Docmost? A self-hosted Confluence alternative
Docmost positions itself directly against Confluence and Notion. The difference: you host it yourself, you own the data, and the Community Edition is free under the AGPL 3.0 license.
The project is backed by a commercial company that sells Enterprise features (SSO, MFA, AI chat) on top of the open-source core. The Community Edition covers everything most teams need for a shared wiki: real-time editing, spaces, permissions, page history, attachments, and search.
Key features (Community vs Enterprise)
Community Edition (free, AGPL 3.0):
- Real-time collaborative rich-text editor (tables, LaTeX math, callouts)
- Spaces for organizing content by team, project, or department
- Permissions and access controls for users and groups
- Inline commenting on pages
- Page history with version tracking and revert
- Nested pages with drag-and-drop reordering
- Full-text search powered by PostgreSQL
- Attachments with S3, Azure Blob, and local storage drivers
- Backlinks and synced blocks (transclusion)
- Page labels, tags, and favorites
- Watch spaces for update notifications
- PDF embed and audio player
- 10+ language translations
Enterprise Edition (paid):
SSO (SAML, OIDC, LDAP), MFA (TOTP), AI Chat with MCP support, page verification workflows, SCIM provisioning, PDF import, DOCX export, Typesense search, audit logs, and security controls.
Enterprise pricing note
The Business Edition costs $3.50 per seat per month with a minimum of 10 seats ($420/year). SSO and MFA are Business-tier only, which has drawn criticism in the self-hosting community. MFA especially, since it’s a basic security feature. Free trial licenses are available at customers.docmost.com.
Docmost Docker Compose installation guide
This is the full step-by-step Docmost installation guide with Docker Compose. The compose file below is based on the official template from the Docmost repository (v0.95.0, July 2025).
Prerequisites for Docker deployment
Before you start, make sure you have:
- A VPS with at least 2 vCPU and 4 GB RAM (8 GB recommended for teams with concurrent editing). You can use a VPS from Hetzner, Hostinger VPS, or a mini PC as a home server.
- Docker and Docker Compose v2 plugin installed (
docker compose versionshould work) - A domain name pointed at the server (A record or CNAME)
- A reverse proxy ready: Cloudflare Tunnel, Nginx, or Traefik (see the best self-hosted server panels for managing Docker)
RAM matters here
PostgreSQL, Redis, and the Node.js app all compete for memory. On a 2 GB VPS you’ll likely hit OOM kills under any real load. Start with 4 GB minimum for production use.
If you want to manage your Docker containers with a web UI, check Dockge: Docker Compose manager for self-hosting.
Docker Compose configuration
This is the approach the official docs recommend: all environment variables inline in the compose file. One file, no .env to sync.
services:
  docmost:
    image: docmost/docmost:latest
    depends_on:
      - db
      - redis
    environment:
      APP_URL: 'https://docs.example.com'
      APP_SECRET: 'REPLACE_WITH_LONG_SECRET'
      DATABASE_URL: 'postgresql://docmost:STRONG_DB_PASSWORD@db:5432/docmost?schema=public'
      REDIS_URL: 'redis://redis:6379'
    ports:
      - "3000:3000"
    restart: unless-stopped
    volumes:
      - docmost:/app/data/storage

  db:
    image: postgres:18
    environment:
      POSTGRES_DB: docmost
      POSTGRES_USER: docmost
      POSTGRES_PASSWORD: STRONG_DB_PASSWORD
    restart: unless-stopped
    volumes:
      - db_data:/var/lib/postgresql

  redis:
    image: redis:8
    command: ["redis-server", "--appendonly", "yes", "--maxmemory-policy", "noeviction"]
    restart: unless-stopped
    volumes:
      - redis_data:/data

volumes:
  docmost:
  db_data:
  redis_data:
If you prefer separating secrets from the compose file, the .env approach still works. Replace STRONG_DB_PASSWORD with your actual password in both the compose file and .env file.
services:
  docmost:
    image: docmost/docmost:latest
    depends_on:
      - db
      - redis
    environment:
      APP_URL: "${APP_URL}"
      APP_SECRET: "${APP_SECRET}"
      DATABASE_URL: "postgresql://${POSTGRES_USER}:${POSTGRES_PASSWORD}@db:5432/${POSTGRES_DB}?schema=public"
      REDIS_URL: "redis://redis:6379"
    ports:
      - "3000:3000"
    restart: unless-stopped
    volumes:
      - docmost:/app/data/storage

  db:
    image: postgres:18
    environment:
      POSTGRES_DB: ${POSTGRES_DB}
      POSTGRES_USER: ${POSTGRES_USER}
      POSTGRES_PASSWORD: ${POSTGRES_PASSWORD}
    restart: unless-stopped
    volumes:
      - db_data:/var/lib/postgresql

  redis:
    image: redis:8
    command: ["redis-server", "--appendonly", "yes", "--maxmemory-policy", "noeviction"]
    restart: unless-stopped
    volumes:
      - redis_data:/data

volumes:
  docmost:
  db_data:
  redis_data:
And the matching .env file:
APP_URL=https://docs.example.com
APP_SECRET=REPLACE_WITH_GENERATED_SECRET
POSTGRES_DB=docmost
POSTGRES_USER=docmost
POSTGRES_PASSWORD=STRONG_DB_PASSWORD
Single source of truth problem
The password in DATABASE_URL and POSTGRES_PASSWORD must match exactly. If you change one without the other, you’ll get a password authentication failed error that’s hard to debug. This is the most common issue with the .env approach.
Three services:
docmost: the application. Maps port 3000 on the host. Mounts a named volume for file attachments at/app/data/storage.db: PostgreSQL 18. Stores all wiki content, users, and metadata. Uses a named volume for data persistence.redis: Redis 8. Handles caching and session state. Runs withappendonly yesfor persistence andnoevictionto prevent data loss under memory pressure.
Key changes from older Docmost Docker Compose guides: postgres:18 (non-Alpine, larger image but more compatible), redis:8 with explicit memory policy, named volumes instead of bind mounts, and no version: "3" line (deprecated in Docker Compose v2).
Environment variables explained
| Variable | Required | Default | Notes |
|---|---|---|---|
APP_URL |
Yes | - | Full URL with https:// protocol. See warning below. |
APP_SECRET |
Yes | - | Min 32 characters. Generate with openssl rand -hex 32 |
DATABASE_URL |
Yes | - | PostgreSQL connection string. Service name must match (db, not docmost-db) |
REDIS_URL |
Yes | - | Redis connection string |
PORT |
No | 3000 |
App listen port |
JWT_TOKEN_EXPIRES_IN |
No | 30d |
JWT token expiry |
FILE_UPLOAD_SIZE_LIMIT |
No | 50mb |
Max file upload size |
FILE_IMPORT_SIZE_LIMIT |
No | 100mb |
Max import size |
DISABLE_TELEMETRY |
No | - | Set to true to opt out of anonymous telemetry |
Generate the APP_SECRET:
openssl rand -hex 32This produces a 64-character hex string (well above the 32-character minimum).
APP_SECRET must be at least 32 characters
Since v0.80.0 (April 2025), Docmost enforces a 32-character minimum for APP_SECRET. If your secret is too short, the app fails to start with: “minLength”:“APP_SECRET must be longer than or equal to 32 characters”. The old openssl rand -base64 command can produce shorter strings. Always use openssl rand -hex 32 instead.
APP_URL must include https://
Docmost sets the auth cookie’s secure flag based on the APP_URL protocol. If you use docs.example.com without https://, authentication cookies won’t work behind a TLS-terminating reverse proxy. Always use the full URL: https://docs.example.com.
For production secrets, consider securely managing Docker Compose secrets rather than hardcoding them in the compose file.
SMTP configuration
To enable email notifications (invites, password resets), add these environment variables to the docmost service:
MAIL_DRIVER: smtp
SMTP_HOST: smtp.example.com
SMTP_PORT: "587"
SMTP_USERNAME: your_username
SMTP_PASSWORD: your_password
SMTP_SECURE: "false"
MAIL_FROM_ADDRESS: hello@example.com
MAIL_FROM_NAME: Docmost
Set SMTP_SECURE to false for STARTTLS on port 587, or true for implicit TLS on port 465. See the full reference at Docmost environment variables.
S3 / Azure storage configuration
For production deployments, offloading file attachments to S3 or Azure Blob is better than storing them on the VPS disk.
S3-compatible storage:
STORAGE_DRIVER: s3
AWS_S3_ACCESS_KEY_ID: "your-key"
AWS_S3_SECRET_ACCESS_KEY: "your-secret"
AWS_S3_REGION: "auto"
AWS_S3_BUCKET: "docmost-attachments"
AWS_S3_ENDPOINT: "https://your-s3-endpoint.com"  # for non-AWS providers
AWS_S3_FORCE_PATH_STYLE: "true"  # required for most S3-compatible providers
Azure Blob Storage:
STORAGE_DRIVER: azure
AZURE_STORAGE_ACCOUNT_NAME: "your-account"
AZURE_STORAGE_ACCOUNT_KEY: "your-key"
AZURE_STORAGE_CONTAINER: "docmost-attachments"
Set STORAGE_DRIVER to local (default) if you don’t need external storage.
Deploying the stack
Once you have your compose file ready (and .env file if using that approach), deploy with:
docker compose up -dThis pulls the images, creates the containers, and starts them in the background. First startup takes 60-90 seconds because Docmost runs database migrations before accepting connections.
Note: the command is docker compose (v2 plugin, no hyphen). The old docker-compose (v1) still works as an alias on most systems, but the official docs use the v2 syntax.
Verifying your installation
After docker compose up -d, run these checks:
# All 3 services should show "Up"
docker compose ps
Expected output:
NAME                IMAGE                  STATUS
docmost-app-1       docmost/docmost:latest Up
docmost-db-1        postgres:18            Up
docmost-redis-1     redis:8                Up
Check the application logs for migration progress:
docker compose logs -f docmostOnce you see the app listening on port 3000, test the health endpoint:
curl http://localhost:3000/api/healthShould return OK. Then open your APP_URL in a browser. You should see the setup page to create your admin account.
Setup page means success
If you see the account creation page in your browser, Docmost is running correctly. Create your admin account and you’re ready to go.
Monitoring after deployment
Once Docmost is running, you should set up monitoring with Beszel and Uptime Kuma to track resource usage and uptime.
Reverse proxy and SSL for Docmost
Docmost needs a reverse proxy for TLS termination and domain routing. There’s one critical requirement that catches most people:
WebSocket support is required
Docmost’s real-time collaborative editor uses WebSocket connections. If your reverse proxy doesn’t forward WebSocket Upgrade and Connection headers, the page editor will load but be read-only. This is the #1 reported issue. Every reverse proxy config below includes the required WebSocket headers.
Cloudflare Tunnel setup with WebSocket support
Cloudflare Tunnels support WebSocket connections by default. No extra configuration needed. This is the simplest SSL approach.
Go to Access > Tunnels in the Cloudflare dashboard, choose your tunnel, and add a hostname:
- Hostname:
docs.yourdomain.com - Service:
http://127.0.0.1:3000

Cloudflare Tunnel origin URL
If cloudflared runs on the host (not inside Docker), use 127.0.0.1:3000 as the origin — not docmost:3000. The docmost hostname only resolves inside the Docker network. If cloudflared runs in a container on the same Docker network, then docmost:3000 works.
You can also use CloudPanel reverse proxy with Docker for a different approach.
Nginx reverse proxy configuration
For Nginx with Let’s Encrypt SSL (via certbot), create this server block:
server {
    listen 80;
    server_name docs.example.com;

    location / {
        proxy_pass http://localhost:3000;
        proxy_http_version 1.1;
        proxy_set_header Upgrade $http_upgrade;
        proxy_set_header Connection "upgrade";
        proxy_set_header Host $host;
        proxy_set_header X-Real-IP $remote_addr;
        proxy_set_header X-Forwarded-For $proxy_add_x_forwarded_for;
        proxy_set_header X-Forwarded-Proto $scheme;
    }
}
Then get the SSL certificate with certbot:
certbot --nginx -d docs.example.comThe proxy_http_version 1.1, Upgrade, and Connection "upgrade" lines are the mandatory WebSocket headers. Without them, the editor loads read-only.
Traefik integration with Docker labels
If you use Traefik (v3.6+), add these labels to the docmost service in your compose file. Traefik natively supports WebSockets — no extra configuration needed.
  docmost:
    image: docmost/docmost:latest
    labels:
      - "traefik.enable=true"
      - "traefik.http.routers.docmost.rule=Host(`docs.example.com`)"
      - "traefik.http.routers.docmost.entrypoints=websecure"
      - "traefik.http.routers.docmost.tls.certresolver=letsencrypt"
      - "traefik.http.services.docmost.loadbalancer.server.port=3000"
    # ... rest of service config
For a full Traefik setup with Docker, see Traefik as a reverse proxy in Docker.
Upgrading your Docmost Docker installation
If you’re running an older version of Docmost, upgrading is usually straightforward:
cd ~/docmost
docker compose pull
docker compose up -d
This pulls the latest images and restarts the containers. Docmost handles database migrations automatically on startup.
APP_SECRET minimum length (v0.8.0+)
If you’re upgrading from a version before v0.80.0 (April 2025), your APP_SECRET must be at least 32 characters. If it’s shorter, the app will fail to start with a validation error. Regenerate with openssl rand -hex 32, update your compose file or .env, and restart.
Migrating from the old Docker Compose format
If your existing setup uses the old compose format (service names docmost-db/docmost-redis, bind mounts like ./docmost-db, postgres:16-alpine), you’ll need to update:
-
Service names: The
DATABASE_URLreferencesdb(wasdocmost-db). Update the hostname in your connection string. -
PostgreSQL data path: Old format mounted
./docmost-db:/var/lib/postgresql/data:rw. The newpostgres:18image uses/var/lib/postgresql(no/datasuffix). If migrating volumes, you may need to move the data directory. -
Named vs bind volumes: The new format uses named volumes (
db_data,docmost,redis_data). If you want to keep your existing bind mount data, either convert to named volumes or keep bind mounts — both work. -
Redis memory policy: The new config adds
--maxmemory-policy noeviction. Some hosts also needvm.overcommit_memory=1set on the host:sysctl vm.overcommit_memory=1.
Before making changes, back up your database (see the backup section below).
Backup and restore for your self-hosted wiki
Don't skip backups
A documentation wiki is only valuable if you can recover it. Set up automated backups from day one.
Backup the database:
docker compose exec db pg_dump -U docmost docmost > docmost-backup-$(date +%Y%m%d).sqlAutomate with a cron job (daily at 3 AM):
0 3 * * * cd /path/to/docmost && docker compose exec db pg_dump -U docmost docmost > /backups/docmost-$(date +\%Y\%m\%d).sqlBackup file attachments:
If using local storage (the default), the attachments live in the docmost named volume. Back it up with:
docker run --rm -v docmost_docmost:/data -v /backups:/backup alpine tar czf /backup/docmost-files-$(date +%Y%m%d).tar.gz -C /data .If using S3 or Azure storage, your attachments are already off-server — just make sure your bucket has versioning enabled.
Restore the database:
docker compose exec -T db psql -U docmost docmost < docmost-backup-20250708.sqlOff-server storage: Copy your backups to a separate server or S3-compatible storage. A backup on the same disk is not a backup.
Troubleshooting common Docmost Docker issues
Editor loads but is read-only — fix WebSocket headers
Symptom: You can view pages but can’t edit them. The editor appears but typing does nothing.
Cause: Your reverse proxy isn’t forwarding WebSocket Upgrade and Connection headers.
Fix: Add these headers to your reverse proxy config (see the Nginx and Traefik sections above):
proxy_http_version 1.1;
proxy_set_header Upgrade $http_upgrade;
proxy_set_header Connection "upgrade";
Cloudflare Tunnel users: WebSockets are supported by default. If the editor is still read-only, check that your origin URL is correct (127.0.0.1:3000 for host-based cloudflared).
APP_SECRET length errors after upgrade
Symptom: App fails to start. Logs show "minLength":"APP_SECRET must be longer than or equal to 32 characters".
Cause: Your APP_SECRET was generated with openssl rand -base64 (old recommendation) and is shorter than 32 characters.
Fix:
openssl rand -hex 32
# Copy the output, replace APP_SECRET in your compose file or .env
docker compose up -d
Database connection and password issues
Symptom: DATABASE_URL must be a valid postgres connection string or password authentication failed.
Cause: Special characters in the password not URL-encoded, or the password in DATABASE_URL doesn’t match POSTGRES_PASSWORD.
Fix:
- Use an alphanumeric password (no special characters) to avoid URL-encoding issues.
- Make sure the same password appears in both
DATABASE_URLandPOSTGRES_PASSWORD.
# Check logs for the exact error
docker compose logs db
docker compose logs docmost
If the password was changed after the volume was created, the database still has the old password. Nuclear option (data loss — only if you have a backup):
docker compose down -v  # WARNING: deletes all data volumes
# Fix the password in your compose file
docker compose up -d
Never use down -v without a backup
docker compose down -v deletes all named volumes. Your entire database and file attachments will be gone. Only use this if you have a recent backup or this is a fresh install.
502 Bad Gateway behind reverse proxy
Symptom: Browser shows 502 Bad Gateway.
Cause: Docmost container isn’t running or hasn’t finished starting.
Fix:
docker compose ps       # Check if docmost is "Up"
docker compose logs docmost  # Check for startup errors
First startup takes 60-90 seconds for database migrations. If the container is restarting in a loop, check the logs for specific errors.
If you’re low on disk space and containers won’t start, you may need to reclaim disk space by cleaning Docker overlay2.
Cloudflare Tunnel can't reach the service
Symptom: Tunnel is configured but the domain returns an error.
Cause: Wrong origin URL. The URL depends on where cloudflared runs.
Fix:
- cloudflared on the host (installed via apt/systemd): Use
http://127.0.0.1:3000as the service URL. The container port 3000 is mapped to the host. - cloudflared in Docker (on the same Docker network): Use
http://docmost:3000as the service URL. Container names resolve within Docker networks.
Check cloudflared logs for connection errors:
journalctl -u cloudflared -fConclusion
Docmost is a solid self-hosted wiki and documentation platform. With over 21,200 GitHub stars, active development (current version v0.95.0), and a real feature set for team collaboration, it’s one of the strongest Confluence alternatives you can run yourself.
The Docker Compose install is three containers — app, PostgreSQL, and Redis. The main gotchas are:
- APP_SECRET must be 32+ characters (generate with
openssl rand -hex 32) - APP_URL must include
https://for auth cookies to work - WebSocket headers must be configured in your reverse proxy or the editor is read-only
- Database passwords must match between
DATABASE_URLandPOSTGRES_PASSWORD
Set up backups from day one. A pg_dump cron job costs nothing and saves you when things go wrong.
For more self-hosted Docker containers for your home server, check out the full list of Docker containers for home server.
Explore More Docker Containers